17 September 2007

Aligning the ISIC Printer

.
Use this guide to correctly align CardMaster.Net's printing to an ISIC (PDL) printer.

Step 1

To access the alignment settings you'll need to login (at www.isiccardmaster.net) using the managerial login for your school, shop or office.

Contact David Pauley if you do not have this. If the SET UP option doesn't appear in the next step, then the login you are using in not managerial.

Once logged in, click SET UP, POS Printing, PDL Printing.

Step 2

Select the card type you wish to adjust the alignment of (ISIC, IYTC etc)

The Section shown below is used to individually adjust the alignment of each 'field' printed onto the labels.
These settings will vary and require a little fine-tuning. See the suggestions further below on these.


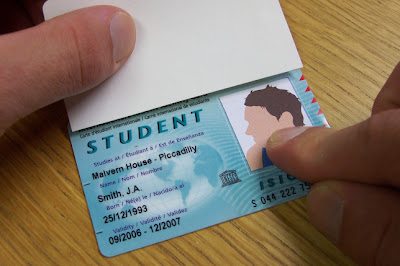
  • It's useful to have an ISIC card to compare the test-prints against. The Label is easily removed from the card provided it is not fully attached.
  • Each printed 'field' has four settings; two horizontal (x) and two vertical (y).
  • All four are measures from the left or top edges of the label.
  • Changes to the settings will be reflected on the test-print labels immediately; you do not have to save the settings after each change.
  • Save the settings when they are correct, or if you're navigating away from the webpage, or changing the card-type you are viewing the settings for.

The four settings are probably best dealt with in the following order.

x value [ ] px
controls the left 'print area'.
If your test prints have the start of a field cut-off like below, then reduce this figure untill the start of the fields is visible.
OLLEGE}
AME}
ATE OF BIRTH}
ALIDITY}

x value [ ] mm
controls the margin.
Reduce this figure to bring the printing closer to the left, increase it to move further to the right.
Printing should begin just to the right of the pre-printed marks on the label's left. This allows maximum space for long Schools and Surnames to fit onto the label.
Setting this alignment the same for all fields will give a neat and tidy final appearence to the card.


y value [ ] px
Should, in theory act the same as x value [ ] px. However in practice it seems to have less affect.
If the test print is missing the {VALIDITY} field from the bottom of the label then these are set to high.
In practice, it tends to work to simply set all of these to zero and adjust the vertical alignment using the next settting, y value [ ] mm

y value [ ]mm
controls each fields distance from the top of the label.
Aim to align each line of text in the middle of it's area on the card to give a neat apperance.
Start by adjusting the first field {COLLEGE}, and moving down the label untill it's correct.
Aim to have the {ELIGIBILITY} field a few MMs above the bottom of the label, having this to low can cause the printer to feed an additional label after each print.

Remember to save your settings!


13 September 2007

Canceling an issued ISIC (or IYTC / ITIC)

Use this procedure to cancel an ISIC (or IYTC / ITIC)

- If it was issued with incorrect details, and you wish to cancel and reissue the card correctly
- If a card has been issued but is not required by that customer, and you wish to return the card to your stock to issue to another customer.

Login into CardMaster.Net, and visit the any one of the card issuing pages, e.g. ISIC
Enter the card number to be canceled into the grey search box on the right, and click GO!


CardMaster.Net will display the searched for card details.
Check this is the card you wish to cancel.
Click the Void Card link


When the pop-up below appears, ensure Incorrectly Issued is selected, and click Void Card


The issuing screen will show again, click Release Card to return the card to your stock, ready to be re-issued.


When the pop-up appears, click Release Card


CardMaster.Net will return the issuing screen, displaying the cardholder's details.
You can either
- begin the issuing process over from this point
or
- Cancel the cardholder (as they are not taking the card) by clicking Cancel Cardhold
er


When the pop-up appears, click Cancel CardHolder


The card and cardholder are not removed from the system. The card can be returned to your stock and issued as per an new card.

10 September 2007

Issuing an ID card

Introduction

This section expalins how to issue an 'ID Card' (i.e. Not an ISIC, IYTC or ITIC) with CardMaster.Net.

Please read the section on issuing ISIC, IYTC and ITIC first, and use this guide as a suppliment to that process.

Parts shown in grey are exactly the same as per the ISIC, IYTC and ITIC process.

Getting Started
The online issuing programe is called CardMaster.Net. It is accessed using Internet Explorer. Use the provided Login and Password to access the system, as shown below.

click image to enlarge


Once logged into CardMaster.Net click on Scholar from the left menu. Cardholder details are then entered using this page.

click image to enlarge

First Name, Surname, Date of Birth & Studies at are mandatory (as signified by a *)

Fill in the Student's 'Enrol Number' and Student's 'End Date' (these are semi-mandatory; you will be reminded to fill them if they are missed).

The Name on Card field is auto-completed by CardMaster.Net, using the First Name & Surname fields. This can be manually changed.

CardMaster.Net requires a 'Card Number' for each card issued.
As the ID cards do not carry these on the card, please use one from the supplied list of numbers. Each number may be used once only. It is recommended that you cut and paste the numbers from the list and save the file (replacing the existing one) after each use, this will ensure your list of numbers always contains (only) usable numbers.

See the screen shots below for an example of doing this.

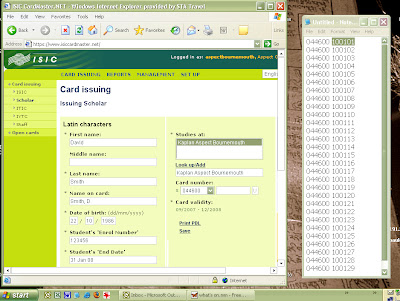
1 - Arrange the CardMaster.Net and number list (in notepad) windows so both are visible, and can be clicked between easily (or use ALT + TAB to jump between the windows).
2 - Double click the final 6 digits of the next (to be used) number.


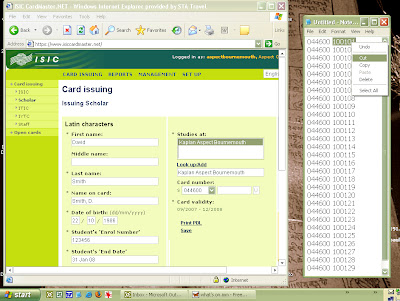
3 - Cut the 6 digit number (either right-click for the contect menu, or use CTRL + X on the keyboard)


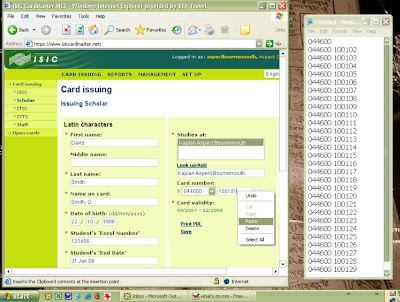
4 - Paste the number into the field in CardMaster.Net (either right click for the contect menu, or use CTRL + V on keyboard)


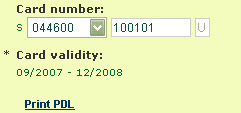
5 - After pasting the number in you must press the TAB key, this will prompt CardMaster.Net to generate the Check-Letter (shown here as a U).
6 - Ignore the Card-Validity dates shown; these will not be printed onto the ID card.


Clicking
on Print PDL stores the data and prints the Cardholder details label (a.k.a. PDL). CardMaster.Net auto selects the PDL printer; a normal 'Print dialog window' is not displayed.

ISIC (& IYTC/ITIC) Card Issuing Process

Introduction

ISIC, IYTC & ITIC Cards are issued using an online program called CardMaster.Net. CardMaster.Net prints the cardholder details onto a transparent label which is then attached to the card. The Labels are printed using a custom printer. The details entered into CardMaster.Net are stored, and may be exported to an Excel or Text file for other purposes.


Getting Started

The online issuing programe is called CardMaster.Net. It is accessed using Internet Explorer. Use the provided Login and Password to access the system, as shown below.

click image to enlarge


Once logged into CardMaster.Net select the Card type to issue using the left menu (e.g. ISIC). Cardholder details are then entered using this page.

click image to enlarge

First Name, Surname, Date of Birth & Studies at are mandatory (as signified by a *). All other fields are optional; filling these may be useful if the data will be exported later.

Up to five custom fields (for example 'Student ID Number') can be assigned into the data collection, printing and export process.

The Name on Card field is auto-completed by CardMaster.Net, using the First Name & Surname fields. This can be manually changed.

ISIC, IYTC and ITIC cards carry a unique card number. The final six digits of this are entered into the Card Number field.

Clicking on Print PDL stores the data and prints the Cardholder details label (a.k.a. PDL). CardMaster.Net auto selects the PDL printer; a normal 'Print dialog window' is not displayed.


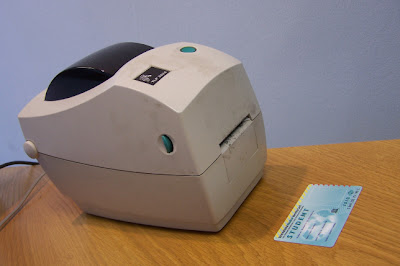
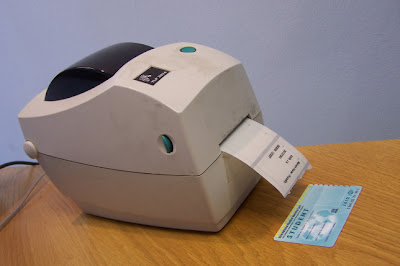
The PDL Printer

click image to enlarge


The PDL is printed within 3 seconds of the onscreen command. It is immediately able to be handled.

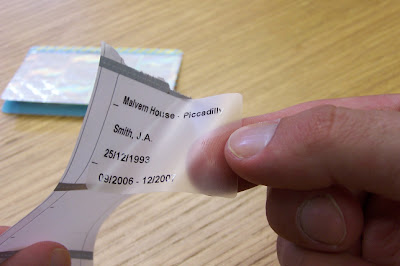
click image to enlarge


Remove the PDL from backing.


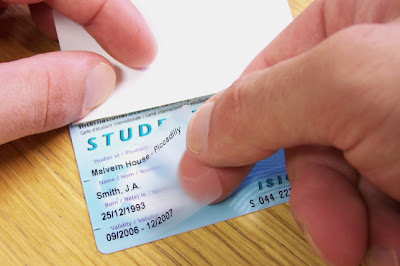
Apply the PDL to the Card with the aid of the black alignment-marks on the left. PDLs can be peeled back and replaced if positioned mistakenly.


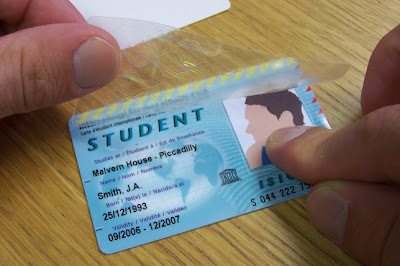
Hold back the adhesive-cover and place the cardholder photo.


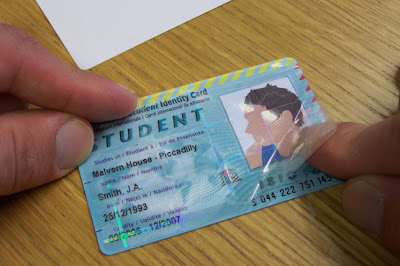
Remove the backing and roll down the cover, keeping the photo in place.


The holographic, tamperproof cover holds the photo in place and prevents the details from being changed.


07 September 2007

Loading the ISIC PDL Printer with PDL Stickers

click any images in this section to enlarge


1 - Open the printer


2 - Remove the Old stocker roll

3 - Position the new sticker roll between the green arms, and thread the sticker through the black guides.

The Green wheel to the right of the guides (just visible in the photo) can be used to adjust the guide spacing.


Loading Printer-ribbon into the ISIC Printer

Click any image in this guide to enlarge


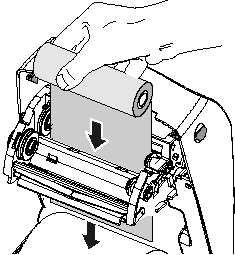
1 - Open the printer by squeezing the green buttons (both sides) forwards.


2 - Lower the Print-Ribbon holder from the top section. The red line shows the path the ribbon will take through the holder.


3 - Open the supplied ribbon


4 - Insert the ribbon down through the gap (behind the second set of wheels) in the holder.

If replacing a ribbon, remove the old ribbon and it's roll. Keep the roll as you will use this to 'collect your new ribbon'.


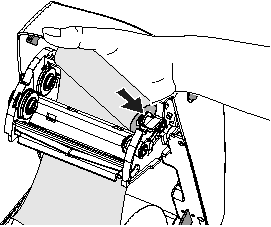
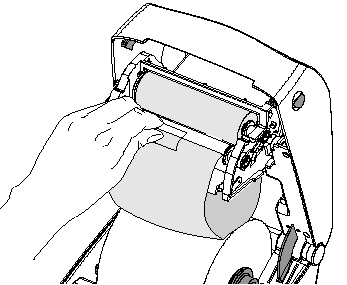
5 - Press the ribbon onto the right-side wheel


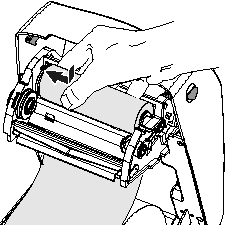
6 - Press the ribbon onto the left-side wheel, aligning the notches.


7 - Position the up-take roll onto the front wheels, aligning the notches. If you are replacing a ribbon, use the old roll from the back.


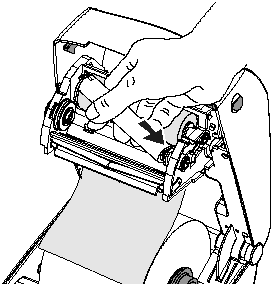
8 -Attach the end of the new ribbon to the uptake-roll with sticky tape


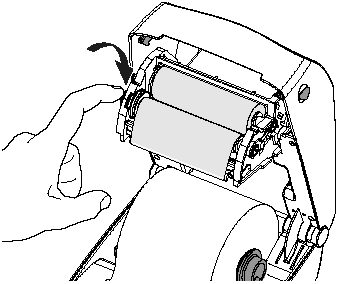
9 - Use the wheels on the left-side to tighten the ribbon so that no slack remains.


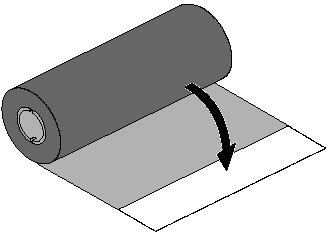
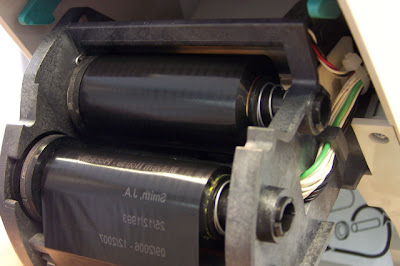
The correctly loaded ribbon will look like this.